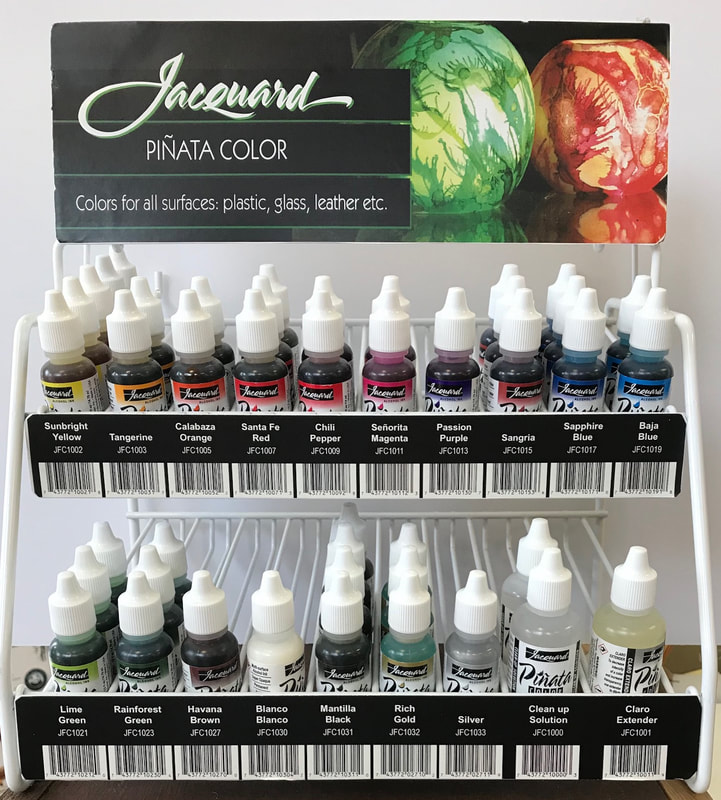
 We have carried Jacquard Inks for a while but some our staff hadn't used them. Amanda and Jill got a chance to experiment with them at a recent trade show. They used the Jacquard Alcohol Inks on Ampersand Claybord panels. It was so much fun! These inks can be used on glass, plastic and leather. Some of our watercolorists use these inks on Yupo. With 17 vivid colors to choose from including gold and silver, you can make magic. The process was very simple. The ink comes in dropper bottles so you can put as much or as little ink on your surface as you would like. Tilt the surface to move the colors around or add some rubbing alcohol (from the drug store) to get more ink movement and to clean up your brushes. If you don't like what you did, use some rubbing alcohol to remove the ink! So easy, so much fun!  This is what Amanda made! Beautiful colors flowing into each other with wonderful layers of transparency. 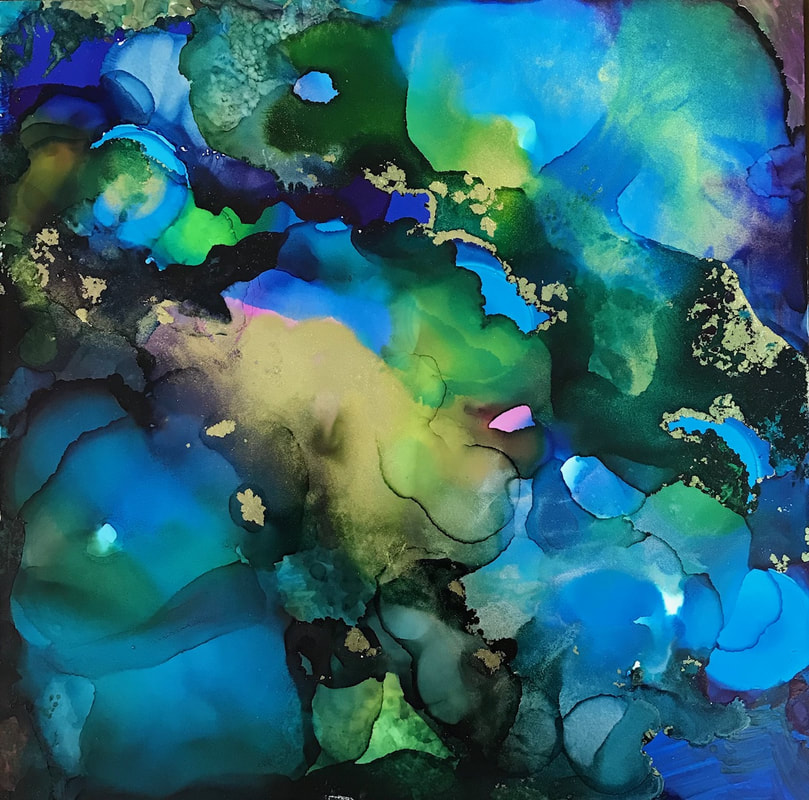 This is Jill's experiment with alcohol inks. They both love the rich blue colors but this piece has some gold added for extra sparkle.
2 Comments
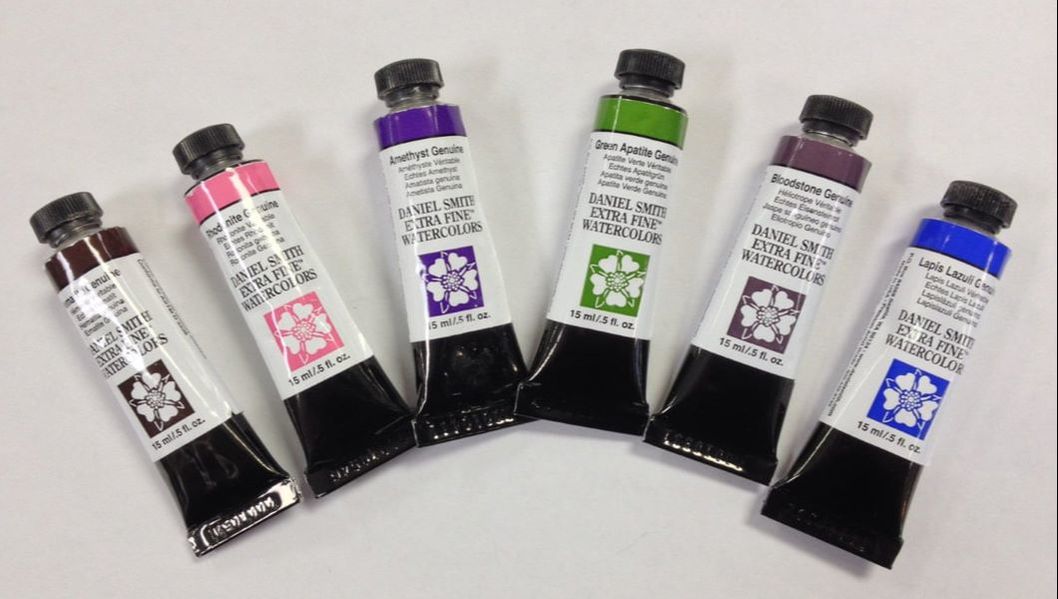
So what is PrimaTek? Glad you asked! Daniel Smith started his company in 1976 to make professional artist grade printmaking inks. In 1993, he started producing watercolor paints. All of his paints are manufactured in Seattle, Washington. The PrimaTek colors have been slowly added to the watercolor selection.  Image courtesy of Daniel Smith Co. Image courtesy of Daniel Smith Co. There are 38 PrimaTek watercolors available. The exciting aspect of these paints is that they are all created from natural minerals and semi-precious stones. The company sends their geologist around the world seeking out the finest natural materials. Rhodonite from Germany, Serpentine from Australia and Lapis Lazuli from Greenland and Mt. Vesuvius in Italy to name a few.  Each mineral is tested in house by their color chemist to see if it will meet the high company standards. The minerals are all milled to the optimum size for that specific material. If the size is too large the paint will be grainy and if the size is too small the color will be dull. Just like in the Goldilocks story everything must be just right! Many of these colors granulate as you paint with them. That means that some of the pigment will settle into the valleys of your paper giving great texture effects. Watch the video below to see how PrimaTek mix to make wonderfully complex colors. We love the new Art Spray from Marabu! It's great for mixed media fun! Click on the picture below to see it in action! 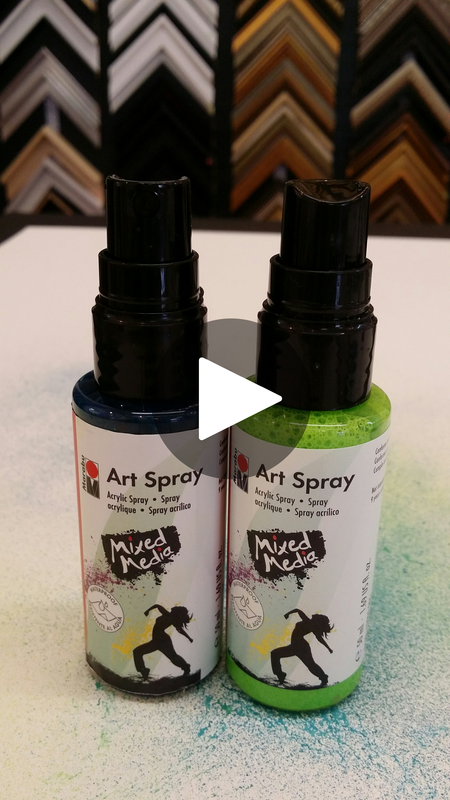 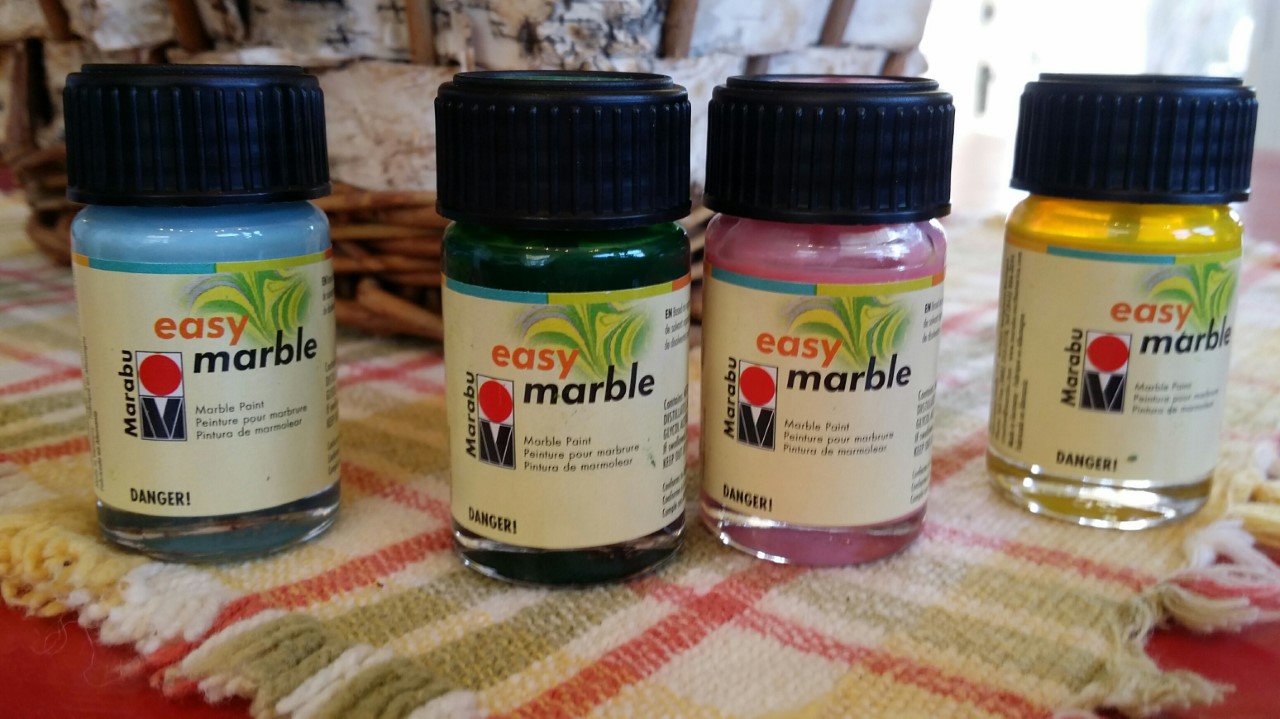 Hi Folks! Here is a demo of one of our most interesting products. It is made by Marabu, and is a resin based marbling compound that is easy to use and will stick to almost anything. Here's what you need to gather to do this project: Some eggs Two large safety Pins A disposable bowl or bucket to hold water 3 or 4 Colors of Marabu Easy Marble Paper towels Wax Paper to cover your table 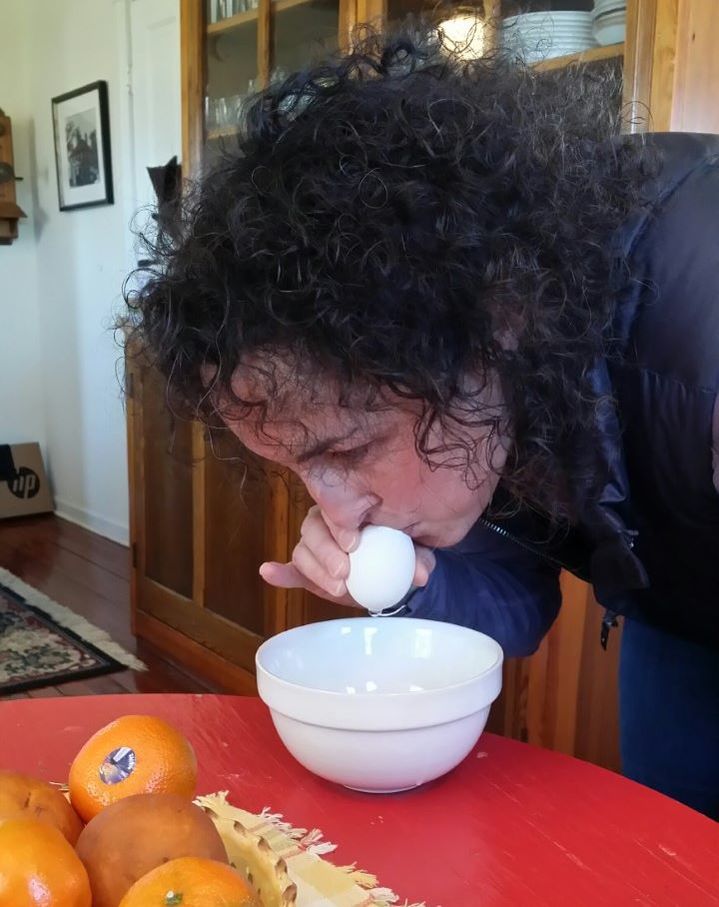 We decided to make marbled easter eggs, so we started by blowing a bunch of fresh eggs from Anne's free range chickens. 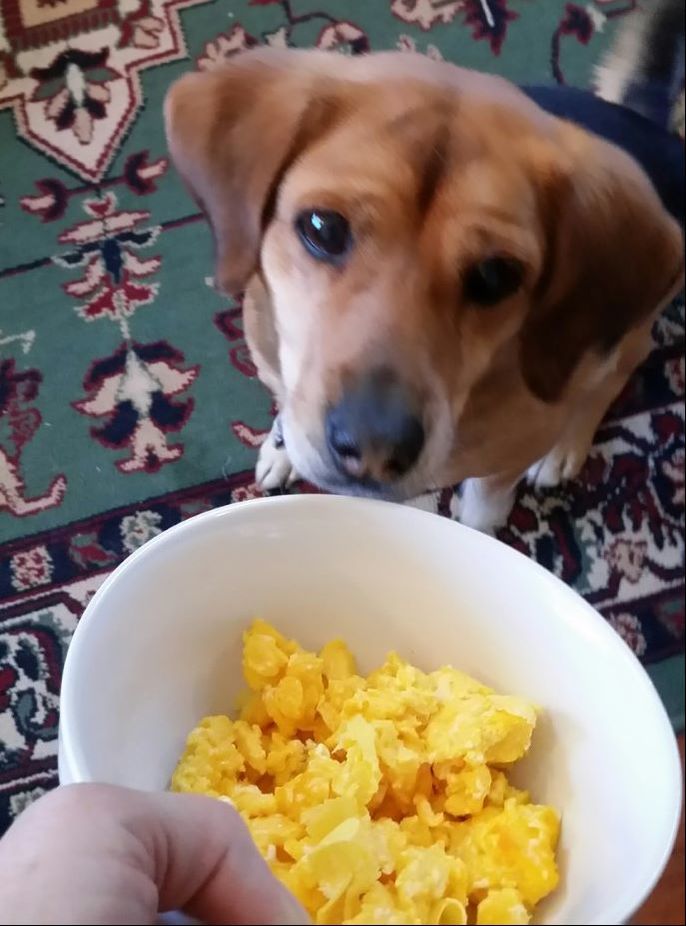 "Princess Penny of the Pillows" got to eat the yummy contents...  She probably would have liked it if we had blown even more eggs... 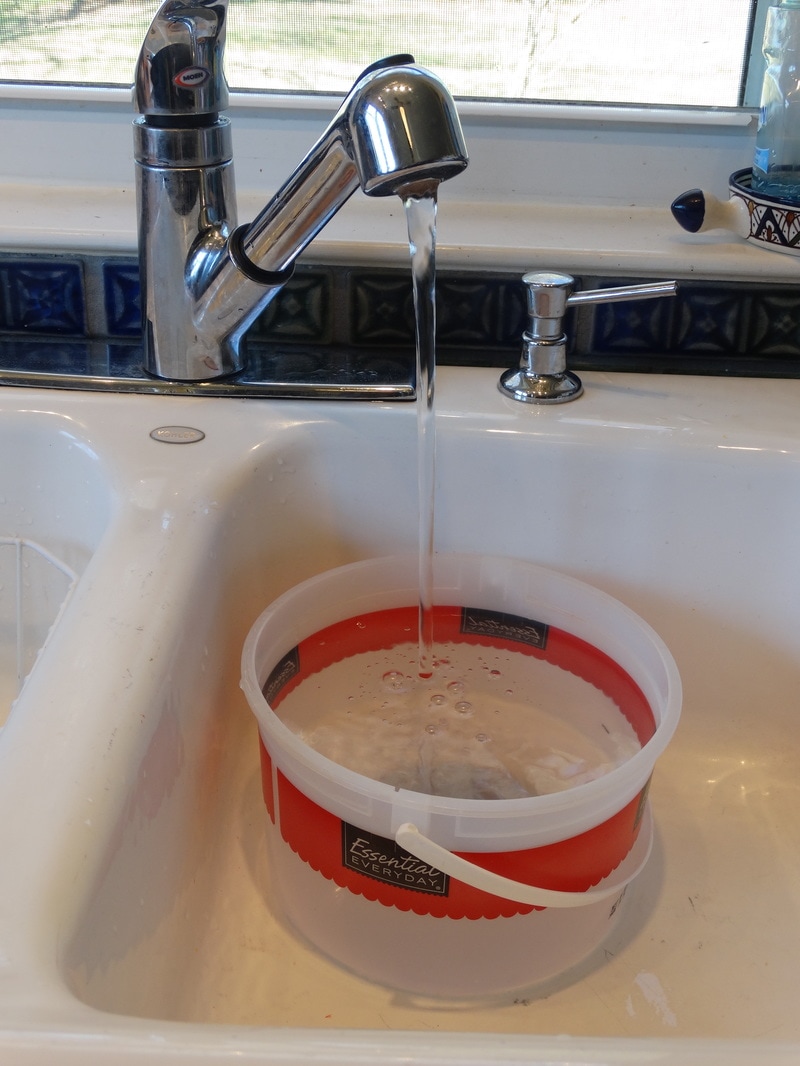 Next, fill a "non-precious" container with water. 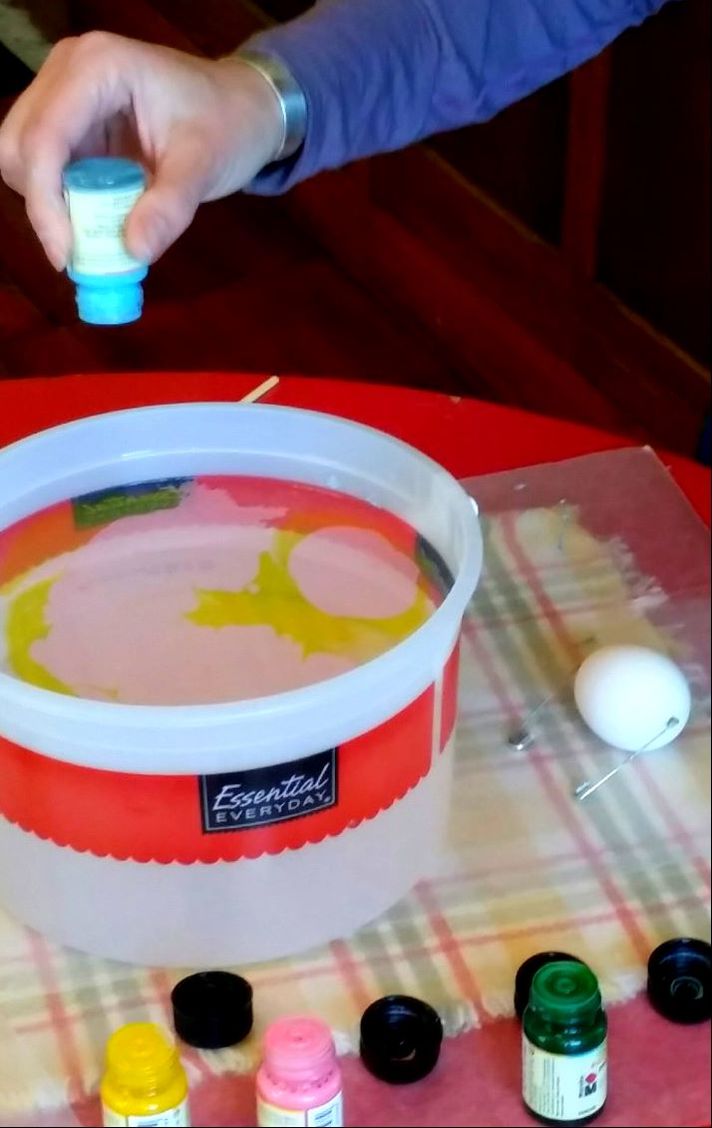 Drip the colors onto the surface of the water.  Swirl the color on the surface of the water with a skewer or stick. 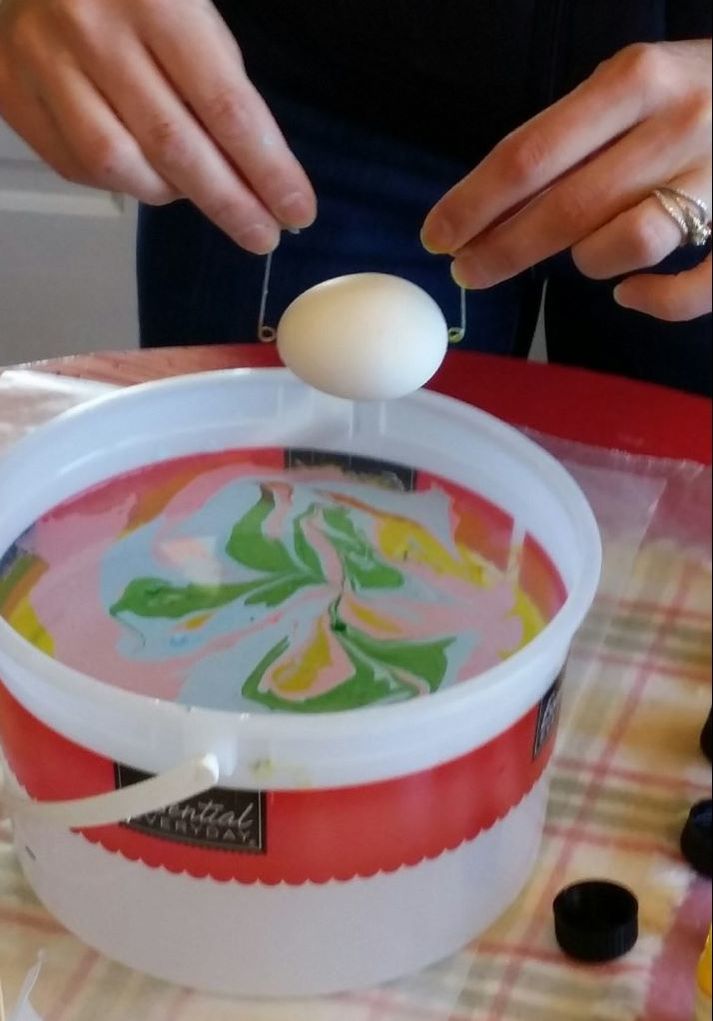 With your egg suspended from two safety pins, lower it into the marbling mixture. 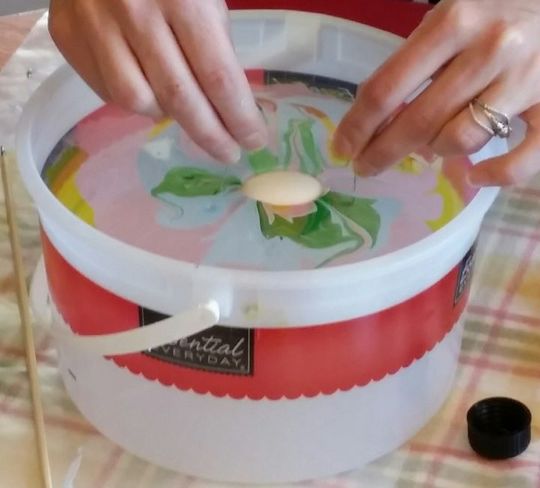 The marbling compound will wrap around the egg as you lower it below the surface of the water. 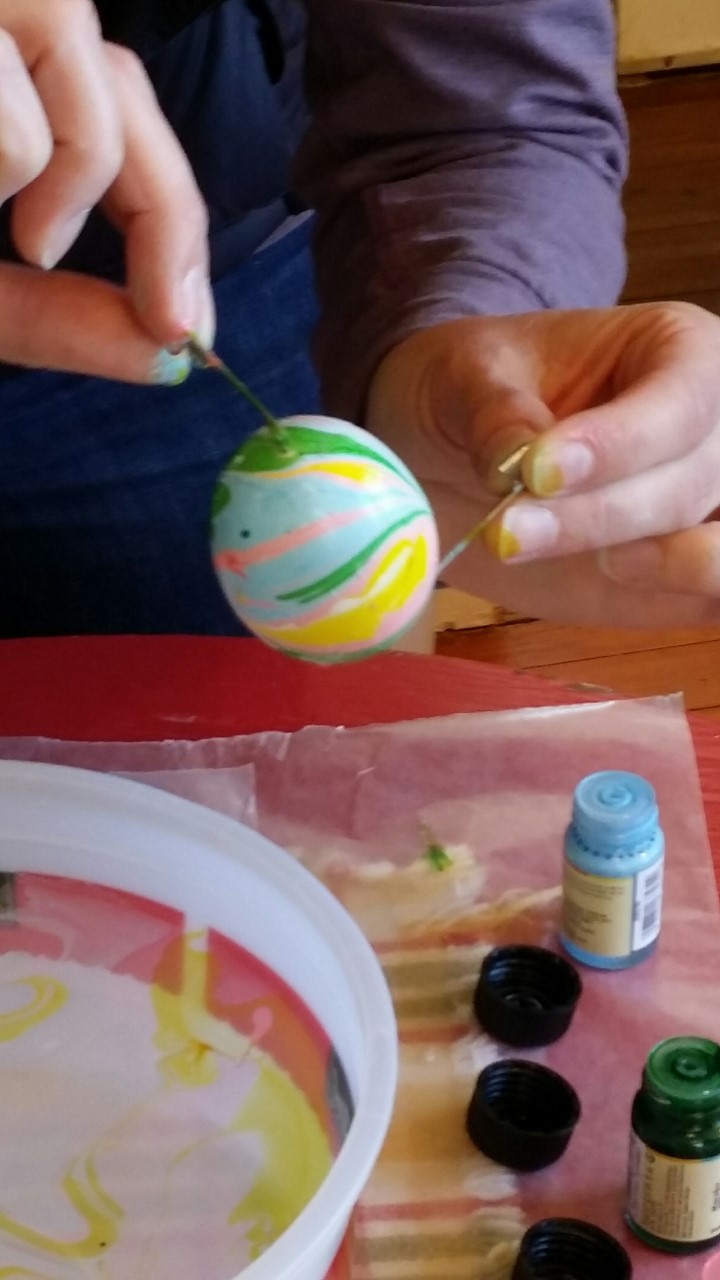 Once you have lowered the egg into the water, you should blow on the surface of the water to move the extra marbling paint away from the egg before you lift it out. 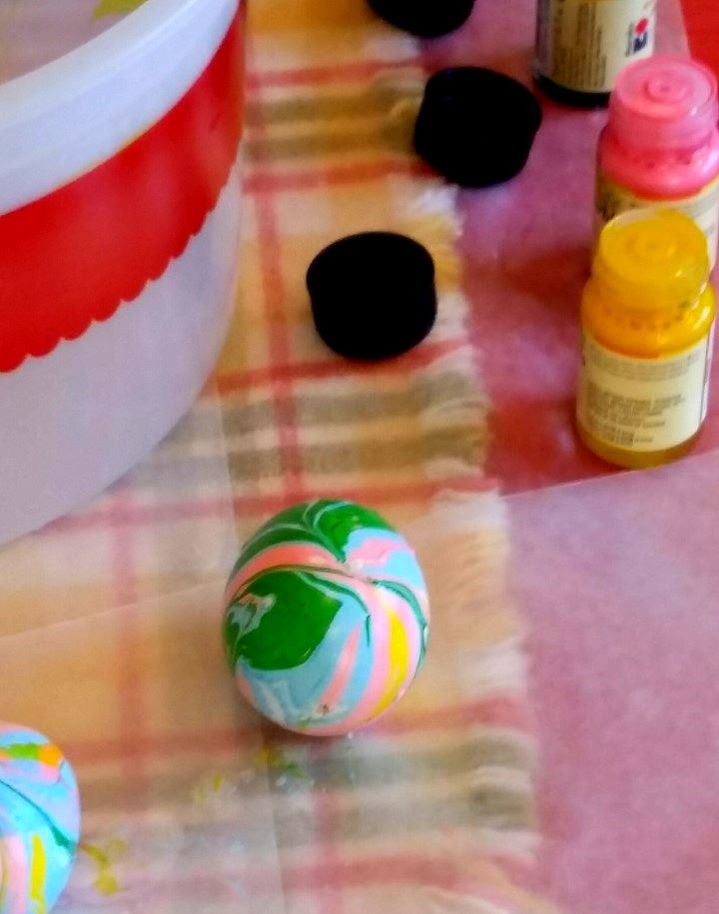 A finished egg. They dry to the touch in about 10 minutes. 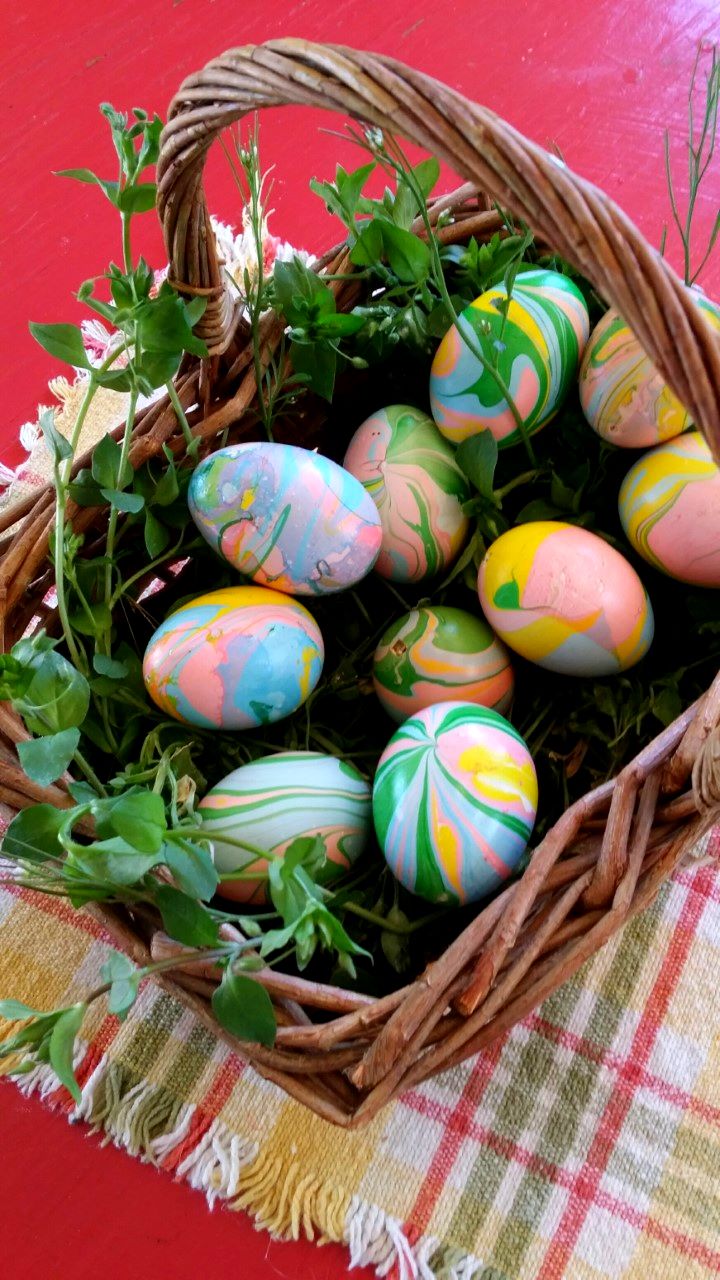 Our beautiful basket of Easter Eggs. And soooo EASY. Check out our YouTube video! Watch Amanda in action.
|
Creative Framing & The Art BoxJoin us on our Creative Journey, encouraging people to embrace the Arts as we share our experience! Archives
November 2021
Categories |
 RSS Feed